

100 TypeScript interview questions
Fundamentals
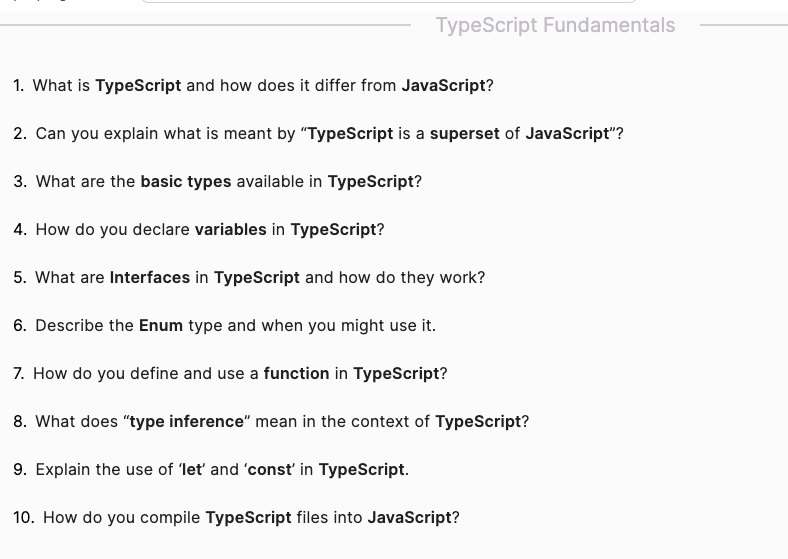
- What is TypeScript and how does it differ from JavaScript? TypeScript is a typed superset of JavaScript that compiles to plain JavaScript. It adds static types to the language, which helps catch errors early through type checking. Example:
   // TypeScript code
let message: string = "Hello, TypeScript!";
JavaScript equivalent:
   // JavaScript code
let message = "Hello, TypeScript!";- Can you explain what is meant by “TypeScript is a superset of JavaScript”? TypeScript is a superset of JavaScript, meaning it includes all JavaScript features plus additional features such as static typing, interfaces, and advanced tooling support. Every valid JavaScript code is also valid TypeScript code.
- What are the basic types available in TypeScript?
booleannumberstringarraytupleenumanyvoidnullandundefinedobjectExample:
   let isActive: boolean = true;
let age: number = 25;
let username: string = "JohnDoe";
let numbers: number[] = [1, 2, 3];
let tuple: [string, number] = ["Hello", 10];- How do you declare variables in TypeScript? Variables in TypeScript are declared using
let,const, orvar, followed by a type annotation. Example:
   let name: string = "Alice";
const age: number = 30;
var isStudent: boolean = false;- What are Interfaces in TypeScript and how do they work? Interfaces in TypeScript define the structure of an object. They are used for type-checking and ensuring that objects adhere to a specific structure. Example:
   interface User {
name: string;
age: number;
}
const user: User = {
name: "John",
age: 25
};- Describe the Enum type and when you might use it. Enums are a way to define named constants. They are useful when you need a set of distinct values. Example:
   enum Direction {
Up,
Down,
Left,
Right
}
let move: Direction = Direction.Up;- How do you define and use a function in TypeScript? Functions in TypeScript can have typed parameters and return types. Example:
   function greet(name: string): string {
return `Hello, ${name}`;
}
let greeting: string = greet("Alice");- What does “type inference” mean in the context of TypeScript? Type inference refers to TypeScript’s ability to automatically infer the type of a variable based on its value. Example:
let score = 100; // TypeScript infers the type as number- Explain the use of ‘let’ and ‘const’ in TypeScript.
letis used to declare variables that can be reassigned.constis used to declare variables that cannot be reassigned. Example:
   let count: number = 10;
count = 20; // allowed
const PI: number = 3.14;
// PI = 3.14159; // Error: Cannot assign to 'PI' because it is a constant.- How do you compile TypeScript files into JavaScript? TypeScript files (
.ts) are compiled into JavaScript using the TypeScript compiler (tsc). Example:tsc app.ts
React Native Example with TypeScript:
import React from 'react';
import { Text, View } from 'react-native';
interface Props {
name: string;
age: number;
}
const Welcome: React.FC<Props> = ({ name, age }) => {
return (
<View>
<Text>Hello, {name}!</Text>
<Text>You are {age} years old.</Text>
</View>
);
};
export default Welcome;
Classes & Objects
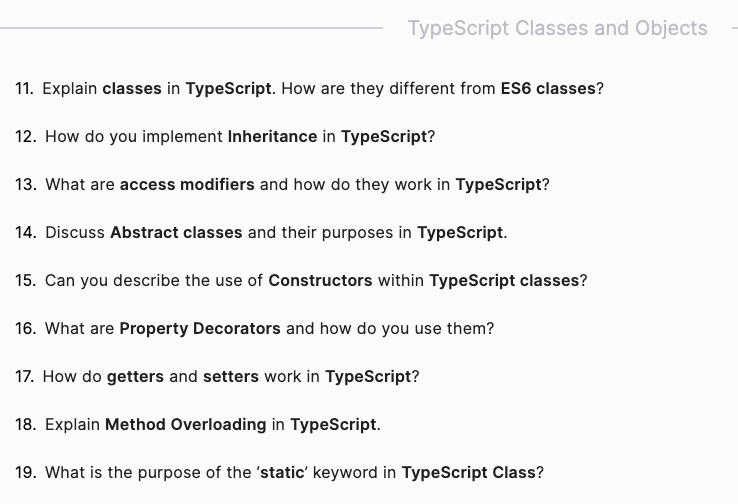
11. Explain classes in TypeScript. How are they different from ES6 classes?
TypeScript classes extend the functionality of ES6 classes by adding features such as type annotations, access modifiers, and abstract classes. This provides better tooling, type safety, and more expressive code.
Example:
class Person {
private name: string;
constructor(name: string) {
this.name = name;
}
greet(): string {
return `Hello, my name is ${this.name}`;
}
}
// React Native component using TypeScript class
import React from 'react';
import { Text, View } from 'react-native';
class Welcome extends React.Component {
private name: string;
constructor(props: any) {
super(props);
this.name = "Alice";
}
render() {
return (
<View>
<Text>{this.greet()}</Text>
</View>
);
}
greet() {
return `Hello, my name is ${this.name}`;
}
}
export default Welcome;
12. How do you implement Inheritance in TypeScript?
Inheritance in TypeScript is implemented using the extends keyword, similar to ES6. This allows a class to inherit properties and methods from another class.
Example:
class Animal {
name: string;
constructor(name: string) {
this.name = name;
}
move(distance: number): void {
console.log(`${this.name} moved ${distance} meters.`);
}
}
class Dog extends Animal {
bark(): void {
console.log('Woof! Woof!');
}
}
const dog = new Dog('Rex');
dog.bark();
dog.move(10);
// React Native component using inherited class
import React from 'react';
import { Text, View } from 'react-native';
class Pet extends Dog {
render() {
return (
<View>
<Text>{this.name} says Woof! Woof!</Text>
</View>
);
}
}
export default Pet;
13. What are access modifiers and how do they work in TypeScript?
Access modifiers in TypeScript control the visibility of class members. The available modifiers are:
public: Accessible from anywhere (default).private: Accessible only within the class.protected: Accessible within the class and its subclasses.
Example:
class Car {
private model: string;
protected year: number;
public brand: string;
constructor(model: string, year: number, brand: string) {
this.model = model;
this.year = year;
this.brand = brand;
}
public getDetails(): string {
return `${this.brand} ${this.model}, ${this.year}`;
}
}
// React Native component demonstrating access modifiers
import React from 'react';
import { Text, View } from 'react-native';
class Vehicle extends Car {
render() {
return (
<View>
<Text>{this.getDetails()}</Text>
</View>
);
}
}
export default Vehicle;
14. Discuss Abstract classes and their purposes in TypeScript.
Abstract classes in TypeScript cannot be instantiated directly. They are meant to be extended by other classes. Abstract classes can contain abstract methods, which must be implemented by the subclasses.
Example:
abstract class Shape {
abstract getArea(): number;
printArea(): void {
console.log(`Area: ${this.getArea()}`);
}
}
class Circle extends Shape {
radius: number;
constructor(radius: number) {
super();
this.radius = radius;
}
getArea(): number {
return Math.PI * this.radius * this.radius;
}
}
const circle = new Circle(5);
circle.printArea(); // Area: 78.53981633974483
// React Native component using abstract class
import React from 'react';
import { Text, View } from 'react-native';
class Geometry extends Circle {
render() {
return (
<View>
<Text>Circle Area: {this.getArea()}</Text>
</View>
);
}
}
export default Geometry;
15. Can you describe the use of Constructors within TypeScript classes?
Constructors in TypeScript are special methods used to initialize objects. They can include parameter type annotations to ensure correct usage.
Example:
class Point {
x: number;
y: number;
constructor(x: number, y: number) {
this.x = x;
this.y = y;
}
display(): void {
console.log(`Point(${this.x}, ${this.y})`);
}
}
const point = new Point(10, 20);
point.display(); // Point(10, 20)
// React Native component using a class with constructor
import React from 'react';
import { Text, View } from 'react-native';
class Coordinate extends Point {
render() {
return (
<View>
<Text>{`Point(${this.x}, ${this.y})`}</Text>
</View>
);
}
}
export default Coordinate;
16. What are Property Decorators and how do you use them?
Property decorators are functions that modify the behavior of class properties. They are used to add metadata or alter property behavior.
Example:
function ReadOnly(target: any, key: string) {
Object.defineProperty(target, key, {
writable: false
});
}
class Book {
@ReadOnly
title: string;
constructor(title: string) {
this.title = title;
}
}
const book = new Book('TypeScript in Action');
// book.title = 'New Title'; // Error: Cannot assign to read only property 'title'
17. How do getters and setters work in TypeScript?
Getters and setters provide a way to control access to a class property. They allow executing logic when getting or setting a property value.
Example:
class Employee {
private _fullName: string;
get fullName(): string {
return this._fullName;
}
set fullName(newName: string) {
this._fullName = newName;
}
}
const employee = new Employee();
employee.fullName = "John Doe";
console.log(employee.fullName); // John Doe
// React Native component using getters and setters
import React from 'react';
import { Text, View } from 'react-native';
class Staff extends Employee {
render() {
return (
<View>
<Text>{`Employee: ${this.fullName}`}</Text>
</View>
);
}
}
export default Staff;
18. Explain Method Overloading in TypeScript.
Method overloading in TypeScript allows a class to have multiple methods with the same name but different parameter types or numbers. The actual implementation will check the arguments and execute the appropriate logic.
Example:
class Calculator {
add(a: number, b: number): number;
add(a: string, b: string): string;
add(a: any, b: any): any {
if (typeof a === 'number' && typeof b === 'number') {
return a + b;
}
if (typeof a === 'string' && typeof b === 'string') {
return a + b;
}
throw new Error('Invalid arguments');
}
}
const calc = new Calculator();
console.log(calc.add(1, 2)); // 3
console.log(calc.add('Hello, ', 'World!')); // Hello, World!
// React Native component using method overloading
import React from 'react';
import { Text, View } from 'react-native';
class Math extends Calculator {
render() {
return (
<View>
<Text>Sum: {this.add(1, 2)}</Text>
<Text>Greeting: {this.add('Hello, ', 'World!')}</Text>
</View>
);
}
}
export default Math;
19. What is the purpose of the ‘static’ keyword in TypeScript Class?
The static keyword defines a class member that belongs to the class itself rather than to instances of the class. Static members are accessed using the class name.
Example:
class MathUtil {
static PI: number = 3.14;
static circleArea(radius: number): number {
return MathUtil.PI * radius * radius;
}
}
console.log(MathUtil.PI); // 3.14
console.log(MathUtil.circleArea(5)); // 78.5
// React Native component using static members
import React from 'react';
import { Text, View } from 'react-native';
class GeometryUtil extends MathUtil {
render() {
return (
<View>
<Text>PI: {MathUtil.PI}</Text>
<Text>Circle Area: {MathUtil.circleArea(5)}</Text>
</View>
);
}
}
export default GeometryUtil;
Types & Assertions
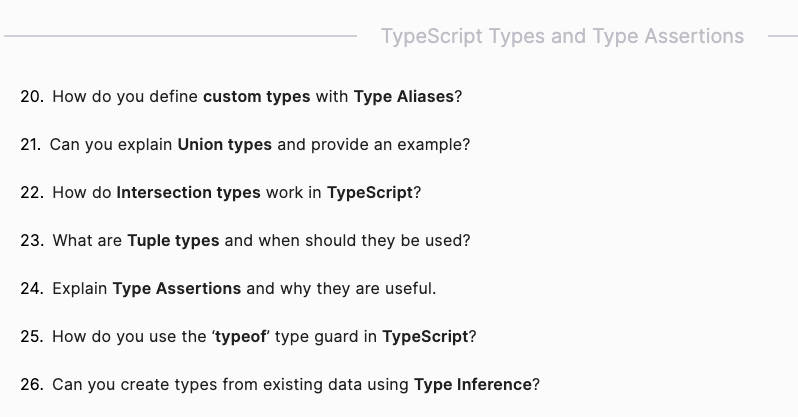
20. How do you define custom types with Type Aliases?
Type aliases in TypeScript allow you to create a new name for an existing type, making your code more readable and manageable.
Example:
type UserID = string;
type User = {
id: UserID;
name: string;
age: number;
};
const user: User = {
id: "123",
name: "Alice",
age: 30
};
// React Native Example:
import React from 'react';
import { Text, View } from 'react-native';
type GreetingProps = {
user: User;
};
const Greeting: React.FC<GreetingProps> = ({ user }) => (
<View>
<Text>Hello, {user.name}!</Text>
</View>
);
export default Greeting;
21. Can you explain Union types and provide an example?
Union types allow a variable to hold multiple types. It is defined using the | operator.
Example:
let value: number | string;
value = 42; // valid
value = "Hello"; // valid
function printValue(value: number | string) {
if (typeof value === "number") {
console.log(`Number: ${value}`);
} else {
console.log(`String: ${value}`);
}
}
printValue(123); // Number: 123
printValue("Hello"); // String: Hello
// React Native Example:
import React from 'react';
import { Text, View } from 'react-native';
type ValueProps = {
value: number | string;
};
const DisplayValue: React.FC<ValueProps> = ({ value }) => (
<View>
<Text>{typeof value === 'number' ? `Number: ${value}` : `String: ${value}`}</Text>
</View>
);
export default DisplayValue;
22. How do Intersection types work in TypeScript?
Intersection types combine multiple types into one. It is defined using the & operator.
Example:
type Person = {
name: string;
age: number;
};
type Employee = {
employeeId: number;
};
type EmployeeDetails = Person & Employee;
const employee: EmployeeDetails = {
name: "John",
age: 35,
employeeId: 101
};
// React Native Example:
import React from 'react';
import { Text, View } from 'react-native';
type EmployeeProps = {
details: EmployeeDetails;
};
const EmployeeInfo: React.FC<EmployeeProps> = ({ details }) => (
<View>
<Text>{`Name: ${details.name}, Age: ${details.age}, Employee ID: ${details.employeeId}`}</Text>
</View>
);
export default EmployeeInfo;
23. What are Tuple types and when should they be used?
Tuples are a way to define arrays with fixed types and a fixed number of elements.
Example:
let tuple: [string, number];
tuple = ["hello", 10]; // valid
// tuple = [10, "hello"]; // Error: Type 'number' is not assignable to type 'string'.
// React Native Example:
import React from 'react';
import { Text, View } from 'react-native';
type TupleComponentProps = {
data: [string, number];
};
const TupleComponent: React.FC<TupleComponentProps> = ({ data }) => (
<View>
<Text>{`String: ${data[0]}, Number: ${data[1]}`}</Text>
</View>
);
export default TupleComponent;
24. Explain Type Assertions and why they are useful.
Type assertions allow you to tell the compiler to treat an entity as a different type. They are useful when you have more information about the type than the compiler does.
Example:
let someValue: any = "this is a string";
let strLength: number = (someValue as string).length;
// React Native Example:
import React from 'react';
import { Text, View } from 'react-native';
type AssertionComponentProps = {
value: any;
};
const AssertionComponent: React.FC<AssertionComponentProps> = ({ value }) => {
const strValue = value as string;
return (
<View>
<Text>{`String Length: ${strValue.length}`}</Text>
</View>
);
};
export default AssertionComponent;
25. How do you use the typeof type guard in TypeScript?
The typeof type guard is used to narrow down the type of a variable within a conditional block.
Example:
function padLeft(value: string | number, padding: string | number) {
if (typeof padding === "number") {
return Array(padding + 1).join(" ") + value;
}
if (typeof padding === "string") {
return padding + value;
}
throw new Error(`Expected string or number, got '${typeof padding}'.`);
}
// React Native Example:
import React from 'react';
import { Text, View } from 'react-native';
type PadLeftComponentProps = {
value: string | number;
padding: string | number;
};
const PadLeftComponent: React.FC<PadLeftComponentProps> = ({ value, padding }) => {
const paddedValue =
typeof padding === "number"
? Array(padding + 1).join(" ") + value
: padding + value;
return (
<View>
<Text>{`Padded Value: ${paddedValue}`}</Text>
</View>
);
};
export default PadLeftComponent;
26. Can you create types from existing data using Type Inference?
Type inference in TypeScript allows the compiler to automatically infer the types of variables and expressions based on their values.
Example:
let inferredString = "This is a string"; // inferred as string
let inferredNumber = 42; // inferred as number
// React Native Example:
import React from 'react';
import { Text, View } from 'react-native';
const TypeInferenceComponent: React.FC = () => {
const message = "TypeScript is great!"; // inferred as string
const count = 100; // inferred as number
return (
<View>
<Text>{`Message: ${message}`}</Text>
<Text>{`Count: ${count}`}</Text>
</View>
);
};
export default TypeInferenceComponent;
TypeScript Generics
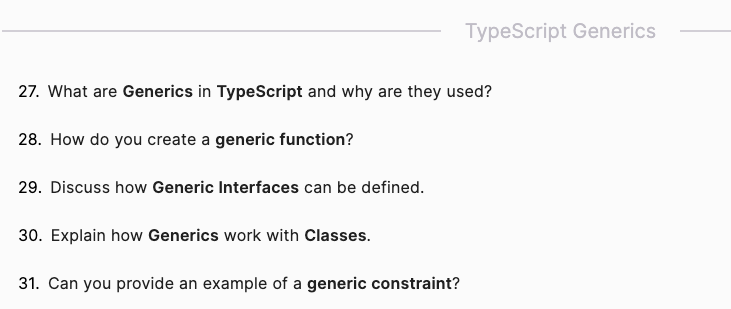
27. What are Generics in TypeScript and why are they used?
Generics in TypeScript allow you to create components that can work with a variety of types rather than a single one. This makes your code more flexible and reusable. Generics enable you to define functions, classes, and interfaces that can operate with any data type while maintaining type safety.
Example:
function identity<T>(arg: T): T {
return arg;
}
let output1 = identity<string>("myString"); // type of output1 is string
let output2 = identity<number>(100); // type of output2 is number
// React Native Example:
import React from 'react';
import { Text, View } from 'react-native';
type GenericComponentProps<T> = {
item: T;
};
const GenericComponent = <T,>({ item }: GenericComponentProps<T>) => (
<View>
<Text>{`Item: ${item}`}</Text>
</View>
);
export default function App() {
return (
<View>
<GenericComponent item="Hello, World!" />
<GenericComponent item={123} />
</View>
);
}
28. How do you create a generic function?
A generic function is defined by adding a type variable inside angle brackets (<>) before the function’s parameter list.
Example:
function echo<T>(arg: T): T {
return arg;
}
let result1 = echo<string>("Hello!"); // type of result1 is string
let result2 = echo<number>(10); // type of result2 is number
// React Native Example:
import React from 'react';
import { Text, View } from 'react-native';
type EchoComponentProps<T> = {
value: T;
};
const EchoComponent = <T,>({ value }: EchoComponentProps<T>) => (
<View>
<Text>{`Value: ${value}`}</Text>
</View>
);
export default function App() {
return (
<View>
<EchoComponent value="Generics are cool!" />
<EchoComponent value={42} />
</View>
);
}
29. Discuss how Generic Interfaces can be defined.
Generic interfaces are interfaces that take one or more type parameters. They can be used to define the shape of objects that are generic.
Example:
interface Box<T> {
contents: T;
}
let stringBox: Box<string> = { contents: "Hello" };
let numberBox: Box<number> = { contents: 42 };
// React Native Example:
import React from 'react';
import { Text, View } from 'react-native';
type BoxProps<T> = {
box: Box<T>;
};
const BoxComponent = <T,>({ box }: BoxProps<T>) => (
<View>
<Text>{`Contents: ${box.contents}`}</Text>
</View>
);
export default function App() {
return (
<View>
<BoxComponent box={{ contents: "Generic Interfaces" }} />
<BoxComponent box={{ contents: 100 }} />
</View>
);
}
30. Explain how Generics work with Classes.
Generics can be used with classes to create classes that can work with any type. This is useful for creating data structures like stacks, queues, or trees that can store any type of data.
Example:
class GenericNumber<T> {
zeroValue: T;
add: (x: T, y: T) => T;
constructor(zeroValue: T, add: (x: T, y: T) => T) {
this.zeroValue = zeroValue;
this.add = add;
}
}
let myGenericNumber = new GenericNumber<number>(0, (x, y) => x + y);
console.log(myGenericNumber.add(5, 10)); // 15
// React Native Example:
import React from 'react';
import { Text, View } from 'react-native';
class Container<T> {
value: T;
constructor(value: T) {
this.value = value;
}
getValue(): T {
return this.value;
}
}
const GenericClassComponent = <T,>({ container }: { container: Container<T> }) => (
<View>
<Text>{`Value: ${container.getValue()}`}</Text>
</View>
);
export default function App() {
const stringContainer = new Container<string>("Generics with Classes");
const numberContainer = new Container<number>(2024);
return (
<View>
<GenericClassComponent container={stringContainer} />
<GenericClassComponent container={numberContainer} />
</View>
);
}
31. Can you provide an example of a generic constraint?
Generic constraints allow you to specify that a generic type parameter must extend a certain type. This ensures that the generic type has the required properties or methods.
Example:
interface Lengthwise {
length: number;
}
function logLength<T extends Lengthwise>(arg: T): T {
console.log(arg.length);
return arg;
}
logLength("Hello"); // Works because string has a length property
// logLength(10); // Error: Argument of type 'number' is not assignable to parameter of type 'Lengthwise'.
// React Native Example:
import React from 'react';
import { Text, View } from 'react-native';
type LengthwiseComponentProps<T extends Lengthwise> = {
item: T;
};
const LengthwiseComponent = <T extends Lengthwise>({ item }: LengthwiseComponentProps<T>) => (
<View>
<Text>{`Length: ${item.length}`}</Text>
</View>
);
export default function App() {
return (
<View>
<LengthwiseComponent item="Hello, Generics!" />
<LengthwiseComponent item={[1, 2, 3]} />
</View>
);
}
Advanced Types & Techniques
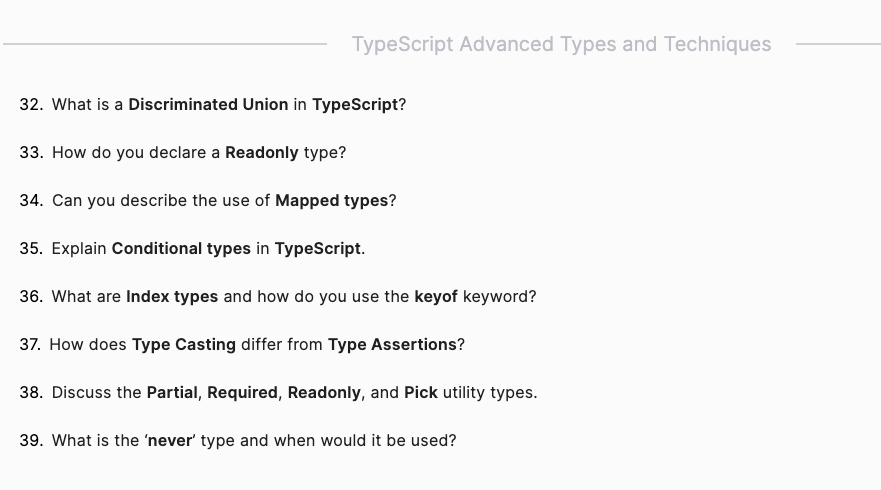
32. What is a Discriminated Union in TypeScript?
A discriminated union is a design pattern used in TypeScript that combines the concepts of union types and literal types. It helps TypeScript to narrow down types and enables type-safe access to properties. Discriminated unions typically involve:
- A union of types.
- A common property (the discriminator) that has a literal type.
Example:
interface Square {
kind: "square";
size: number;
}
interface Rectangle {
kind: "rectangle";
width: number;
height: number;
}
interface Circle {
kind: "circle";
radius: number;
}
type Shape = Square | Rectangle | Circle;
function area(shape: Shape): number {
switch (shape.kind) {
case "square":
return shape.size * shape.size;
case "rectangle":
return shape.width * shape.height;
case "circle":
return Math.PI * shape.radius * shape.radius;
}
}
// React Native Example:
import React from 'react';
import { Text, View } from 'react-native';
type ShapeProps = {
shape: Shape;
};
const ShapeComponent: React.FC<ShapeProps> = ({ shape }) => {
const shapeArea = area(shape);
return (
<View>
<Text>{`Shape Area: ${shapeArea}`}</Text>
</View>
);
};
export default ShapeComponent;
33. How do you declare a Readonly type?
The Readonly type in TypeScript is a utility type that makes all properties of an object type readonly, meaning they cannot be reassigned.
Example:
interface User {
id: number;
name: string;
}
const user: Readonly<User> = {
id: 1,
name: "Alice"
};
// user.id = 2; // Error: Cannot assign to 'id' because it is a read-only property.
// React Native Example:
import React from 'react';
import { Text, View } from 'react-native';
type ReadonlyProps = {
user: Readonly<User>;
};
const ReadonlyComponent: React.FC<ReadonlyProps> = ({ user }) => (
<View>
<Text>{`User ID: ${user.id}, User Name: ${user.name}`}</Text>
</View>
);
export default ReadonlyComponent;
34. Can you describe the use of Mapped types?
Mapped types in TypeScript allow you to create new types by transforming properties of an existing type. You can use them to create types like Partial, Readonly, or other custom transformations.
Example:
type User = {
id: number;
name: string;
email: string;
};
type PartialUser = {
[P in keyof User]?: User[P];
};
// Equivalent to:
interface PartialUserManual {
id?: number;
name?: string;
email?: string;
}
// React Native Example:
import React from 'react';
import { Text, View } from 'react-native';
type MappedProps = {
user: PartialUser;
};
const MappedComponent: React.FC<MappedProps> = ({ user }) => (
<View>
<Text>{`User ID: ${user.id}, User Name: ${user.name}, User Email: ${user.email}`}</Text>
</View>
);
export default MappedComponent;
35. Explain Conditional types in TypeScript.
Conditional types allow you to create types that depend on a condition. They follow the syntax T extends U ? X : Y.
Example:
type Message<T> = T extends string ? string : number;
let message1: Message<string>; // type is string
let message2: Message<number>; // type is number
// React Native Example:
import React from 'react';
import { Text, View } from 'react-native';
type ConditionalProps<T> = {
value: T;
};
const ConditionalComponent = <T,>({ value }: ConditionalProps<T>) => (
<View>
<Text>{`Value: ${value}`}</Text>
</View>
);
export default function App() {
return (
<View>
<ConditionalComponent value="Hello, Conditional Types!" />
<ConditionalComponent value={123} />
</View>
);
}
36. What are Index types and how do you use the keyof keyword?
Index types allow you to define types that use the keys of another type. The keyof keyword creates a union of the keys of a given type.
Example:
type User = {
id: number;
name: string;
email: string;
};
type UserKeys = keyof User; // 'id' | 'name' | 'email'
function getValue<T, K extends keyof T>(obj: T, key: K): T[K] {
return obj[key];
}
const user: User = { id: 1, name: "Alice", email: "alice@example.com" };
const userId = getValue(user, "id"); // 1
// React Native Example:
import React from 'react';
import { Text, View } from 'react-native';
type IndexProps<T> = {
obj: T;
key: keyof T;
};
const IndexComponent = <T,>({ obj, key }: IndexProps<T>) => (
<View>
<Text>{`Value: ${obj[key]}`}</Text>
</View>
);
export default function App() {
return (
<View>
<IndexComponent obj={user} key="name" />
<IndexComponent obj={user} key="email" />
</View>
);
}
37. How does Type Casting differ from Type Assertions?
Type casting is a way to explicitly tell the compiler to treat a value as a different type. In TypeScript, type assertions serve the same purpose and are done using the as keyword or angle bracket syntax.
Example:
let someValue: any = "this is a string";
let strLength: number = (someValue as string).length;
// or
let strLength2: number = (<string>someValue).length;
// React Native Example:
import React from 'react';
import { Text, View } from 'react-native';
type TypeCastProps = {
value: any;
};
const TypeCastComponent: React.FC<TypeCastProps> = ({ value }) => {
const strValue = value as string;
return (
<View>
<Text>{`String Length: ${strValue.length}`}</Text>
</View>
);
};
export default TypeCastComponent;
38. Discuss the Partial, Required, Readonly, and Pick utility types.
Partial: Makes all properties of a type optional.Required: Makes all properties of a type required.Readonly: Makes all properties of a type readonly.Pick: Creates a type by picking a set of properties from another type.
Example:
interface User {
id: number;
name: string;
email?: string;
}
type PartialUser = Partial<User>;
type RequiredUser = Required<User>;
type ReadonlyUser = Readonly<User>;
type PickedUser = Pick<User, "id" | "name">;
// React Native Example:
import React from 'react';
import { Text, View } from 'react-native';
type UtilityProps = {
user: PartialUser;
readonlyUser: ReadonlyUser;
};
const UtilityComponent: React.FC<UtilityProps> = ({ user, readonlyUser }) => (
<View>
<Text>{`Partial User: ${user.name}`}</Text>
<Text>{`Readonly User: ${readonlyUser.name}`}</Text>
</View>
);
export default function App() {
return (
<View>
<UtilityComponent
user={{ id: 1, name: "Alice" }}
readonlyUser={{ id: 2, name: "Bob", email: "bob@example.com" }}
/>
</View>
);
}
39. What is the never type and when would it be used?
The never type represents values that never occur. It is used for functions that never return or for variables that cannot hold any value.
Example:
function error(message: string): never {
throw new Error(message);
}
function infiniteLoop(): never {
while (true) {}
}
// React Native Example:
import React from 'react';
import { Text, View } from 'react-native';
type NeverComponentProps = {
shouldThrow: boolean;
};
const NeverComponent: React.FC<NeverComponentProps> = ({ shouldThrow }) => {
if (shouldThrow) {
error("This is an error message");
}
return (
<View>
<Text>This component never reaches here if shouldThrow is true.</Text>
</View>
);
};
export default NeverComponent;
Modules & Namespaces
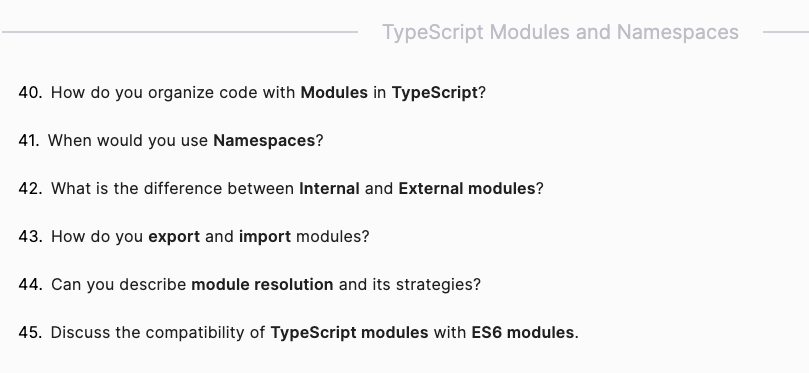
40. How do you organize code with Modules in TypeScript?
Modules in TypeScript allow you to organize code into self-contained units. Each module can export classes, interfaces, functions, or variables to be used in other modules. Modules help in managing code dependencies and improving code maintainability.
Example:
// mathUtils.ts
export function add(a: number, b: number): number {
return a + b;
}
export function subtract(a: number, b: number): number {
return a - b;
}
// React Native Example:
import React from 'react';
import { Text, View } from 'react-native';
import { add, subtract } from './mathUtils';
const MathComponent: React.FC = () => (
<View>
<Text>{`Add: ${add(10, 5)}`}</Text>
<Text>{`Subtract: ${subtract(10, 5)}`}</Text>
</View>
);
export default MathComponent;
41. When would you use Namespaces?
Namespaces in TypeScript are used to organize code into logical groups and prevent naming collisions. They are useful in applications where you want to encapsulate multiple related pieces of functionality without creating separate modules.
Example:
namespace Geometry {
export interface Shape {
area(): number;
}
export class Circle implements Shape {
constructor(public radius: number) {}
area(): number {
return Math.PI * this.radius * this.radius;
}
}
export class Square implements Shape {
constructor(public size: number) {}
area(): number {
return this.size * this.size;
}
}
}
// React Native Example:
import React from 'react';
import { Text, View } from 'react-native';
const GeometryComponent: React.FC = () => {
const circle = new Geometry.Circle(5);
const square = new Geometry.Square(4);
return (
<View>
<Text>{`Circle Area: ${circle.area()}`}</Text>
<Text>{`Square Area: ${square.area()}`}</Text>
</View>
);
};
export default GeometryComponent;
42. What is the difference between Internal and External modules?
- Internal Modules (deprecated term for namespaces) are used to organize code within a single file or across multiple files but without using the module system. They are useful for organizing code within a single global namespace.
- External Modules are files that import and export functionality using the module system. They use
importandexportstatements and are suitable for larger codebases where you need to manage dependencies between different parts of your application.
43. How do you export and import modules?
Modules are exported using the export keyword and imported using the import keyword.
Example:
// mathUtils.ts
export function multiply(a: number, b: number): number {
return a * b;
}
// React Native Example:
import React from 'react';
import { Text, View } from 'react-native';
import { multiply } from './mathUtils';
const MultiplyComponent: React.FC = () => (
<View>
<Text>{`Multiply: ${multiply(10, 5)}`}</Text>
</View>
);
export default MultiplyComponent;
44. Can you describe module resolution and its strategies?
Module resolution is the process by which TypeScript determines the location of modules to import. The two primary strategies are:
- Classic: Used in older codebases where modules are not organized using the Node.js module system.
- Node: Mimics the Node.js module resolution strategy, looking for modules in
node_modulesdirectories and handling package names and paths.
45. Discuss the compatibility of TypeScript modules with ES6 modules.
TypeScript modules are fully compatible with ES6 modules. TypeScript’s import and export statements directly correspond to ES6 module syntax. This compatibility ensures that TypeScript can be seamlessly integrated into projects that use ES6 modules.
Example:
// es6Module.js
export const greet = (name) => `Hello, ${name}!`;
// TypeScript File
import { greet } from './es6Module';
console.log(greet('Alice')); // Hello, Alice!
// React Native Example:
import React from 'react';
import { Text, View } from 'react-native';
import { greet } from './es6Module';
const GreetComponent: React.FC = () => (
<View>
<Text>{greet('Bob')}</Text>
</View>
);
export default GreetComponent;
Decorators & Metadata

46. What are Decorators and how do you use them?
Decorators in TypeScript are a special kind of declaration that can be attached to a class, method, accessor, property, or parameter. Decorators are used to add metadata or modify the behavior of the decorated element.
Example:
function Logger(constructor: Function) {
console.log('Logging...');
console.log(constructor);
}
@Logger
class Person {
name = 'John';
constructor() {
console.log('Creating person object...');
}
}
const person = new Person();
47. Can you define Class Decorators and how they can alter Class behavior?
Class decorators are functions that take a class constructor as an argument. They can add properties, methods, or even replace the constructor to alter the class behavior.
Example:
function Injectable(constructor: Function) {
constructor.prototype.injected = true;
}
@Injectable
class Service {
constructor() {}
}
const service = new Service();
console.log((service as any).injected); // true
48. How do you use Method Decorators in TypeScript?
Method decorators are applied to the methods of a class. They receive the target, the method name, and the property descriptor as arguments and can modify the method behavior or add metadata.
Example:
function Log(target: any, propertyKey: string, descriptor: PropertyDescriptor) {
const originalMethod = descriptor.value;
descriptor.value = function (...args: any[]) {
console.log(`Method ${propertyKey} called with args: ${JSON.stringify(args)}`);
return originalMethod.apply(this, args);
};
return descriptor;
}
class Calculator {
@Log
add(a: number, b: number): number {
return a + b;
}
}
const calculator = new Calculator();
console.log(calculator.add(2, 3)); // Logs: Method add called with args: [2,3] and returns 5
49. What are Accessor Decorators?
Accessor decorators are applied to getters and setters of a class. They receive the target, the name of the accessor, and the property descriptor. They can be used to modify or log access to properties.
Example:
function LogAccessor(target: any, propertyKey: string, descriptor: PropertyDescriptor) {
const originalGet = descriptor.get;
descriptor.get = function () {
console.log(`Get ${propertyKey}`);
return originalGet?.apply(this);
};
return descriptor;
}
class Person {
private _name: string = 'John';
@LogAccessor
get name(): string {
return this._name;
}
set name(value: string) {
this._name = value;
}
}
const person = new Person();
console.log(person.name); // Logs: Get name and returns 'John'
50. Explain how to use Property Decorators.
Property decorators are applied to class properties. They receive the target and the property key. They can be used to add metadata or modify property behavior.
Example:
function Readonly(target: any, propertyKey: string) {
Object.defineProperty(target, propertyKey, {
writable: false,
});
}
class User {
@Readonly
name: string = 'John';
}
const user = new User();
// user.name = 'Alice'; // Error: Cannot assign to 'name' because it is a read-only property.
51. How do Decorators compose in TypeScript?
Decorators in TypeScript are applied in a bottom-up fashion, meaning that when multiple decorators are applied to a single declaration, the decorators are evaluated in reverse order of their appearance.
Example:
function First() {
console.log('First(): factory evaluated');
return function (target: any, propertyKey: string, descriptor: PropertyDescriptor) {
console.log('First(): called');
};
}
function Second() {
console.log('Second(): factory evaluated');
return function (target: any, propertyKey: string, descriptor: PropertyDescriptor) {
console.log('Second(): called');
};
}
class Example {
@First()
@Second()
method() {}
}
const example = new Example();
example.method();
// Logs:
// First(): factory evaluated
// Second(): factory evaluated
// Second(): called
// First(): called
52. Discuss Reflection and how it works with Decorators.
Reflection in TypeScript involves the ability to inspect metadata about types at runtime. TypeScript’s experimental metadata reflection API allows decorators to attach metadata to class members. The reflect-metadata library is commonly used for this purpose.
Example:
import 'reflect-metadata';
function ReflectiveMetadata(target: any, propertyKey: string) {
Reflect.defineMetadata('custom:annotation', 'metadataValue', target, propertyKey);
}
class Demo {
@ReflectiveMetadata
method() {}
}
const demo = new Demo();
const metadataValue = Reflect.getMetadata('custom:annotation', demo, 'method');
console.log(metadataValue); // metadataValue
React Native Example with Decorators:
import React from 'react';
import { Text, View } from 'react-native';
import 'reflect-metadata';
function Log(target: any, propertyKey: string, descriptor: PropertyDescriptor) {
const originalMethod = descriptor.value;
descriptor.value = function (...args: any[]) {
console.log(`Method ${propertyKey} called with args: ${JSON.stringify(args)}`);
return originalMethod.apply(this, args);
};
return descriptor;
}
class MathService {
@Log
add(a: number, b: number): number {
return a + b;
}
}
const mathService = new MathService();
const DecoratorComponent: React.FC = () => (
<View>
<Text>{`Addition Result: ${mathService.add(5, 3)}`}</Text>
</View>
);
export default DecoratorComponent;
Configuration & Compilation
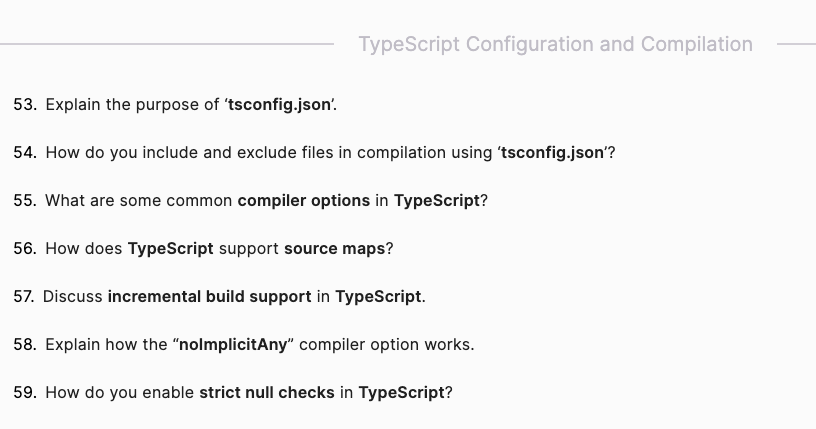
53. Explain the purpose of tsconfig.json.
tsconfig.json is a configuration file for TypeScript projects that specifies the root files and the compiler options required to compile the project. It allows you to define settings such as the target JavaScript version, module system, file inclusions, and exclusions.
Example:
{
"compilerOptions": {
"target": "es6",
"module": "commonjs",
"strict": true,
"esModuleInterop": true
},
"include": ["src"],
"exclude": ["node_modules", "**/*.spec.ts"]
}
54. How do you include and exclude files in compilation using tsconfig.json?
In tsconfig.json, you can use the include and exclude properties to specify which files should be included or excluded from the TypeScript compilation process.
Example:
{
"include": ["src/**/*"],
"exclude": ["node_modules", "dist"]
}
This configuration includes all files in the src directory and excludes files in the node_modules and dist directories.
55. What are some common compiler options in TypeScript?
Some common compiler options in TypeScript include:
target: Specifies the ECMAScript target version (e.g.,es5,es6).module: Defines the module system (e.g.,commonjs,esnext).strict: Enables all strict type-checking options.outDir: Specifies the output directory for compiled files.rootDir: Specifies the root directory of input files.sourceMap: Generates source map files for debugging.
Example:
{
"compilerOptions": {
"target": "es6",
"module": "commonjs",
"outDir": "./dist",
"rootDir": "./src",
"strict": true,
"sourceMap": true
}
}
56. How does TypeScript support source maps?
TypeScript supports source maps through the sourceMap compiler option. When enabled, the TypeScript compiler generates a .map file for each .js file, allowing you to map the compiled JavaScript code back to the original TypeScript source code. This is useful for debugging.
Example:
{
"compilerOptions": {
"sourceMap": true
}
}
57. Discuss incremental build support in TypeScript.
Incremental build support in TypeScript allows the compiler to reuse information from previous compilations to improve compilation speed. This is particularly useful in large projects. The incremental option creates a .tsbuildinfo file, which stores information about the project’s state.
Example:
{
"compilerOptions": {
"incremental": true
}
}
58. Explain how the noImplicitAny compiler option works.
The noImplicitAny compiler option, when enabled, raises an error whenever the compiler cannot infer a variable’s type and implicitly assigns it the any type. This helps catch potential errors by ensuring that all types are explicitly defined.
Example:
{
"compilerOptions": {
"noImplicitAny": true
}
}
Without noImplicitAny:
function greet(name) {
console.log(`Hello, ${name}`);
}
greet("Alice"); // No error, but `name` has an implicit `any` type.
With noImplicitAny:
function greet(name: string) {
console.log(`Hello, ${name}`);
}
greet("Alice"); // Error if `name` type is not defined.
59. How do you enable strict null checks in TypeScript?
Strict null checks can be enabled using the strictNullChecks compiler option. When enabled, null and undefined are only assignable to void or their respective types. This helps prevent runtime errors by ensuring that variables are properly checked for null or undefined values.
Example:
{
"compilerOptions": {
"strictNullChecks": true
}
}
With strictNullChecks enabled:
let name: string = "Alice";
// name = null; // Error: Type 'null' is not assignable to type 'string'.
function greet(name: string | null) {
if (name) {
console.log(`Hello, ${name}`);
} else {
console.log("Hello, guest");
}
}
greet(null); // Works correctly because we handle the null case.
React Native Example with tsconfig.json
tsconfig.json:
{
"compilerOptions": {
"target": "es6",
"module": "commonjs",
"strict": true,
"esModuleInterop": true,
"outDir": "build",
"rootDir": "src",
"sourceMap": true,
"noImplicitAny": true,
"strictNullChecks": true,
"incremental": true
},
"include": ["src/**/*"],
"exclude": ["node_modules", "build"]
}
Example Component:
// src/components/Greet.tsx
import React from 'react';
import { Text, View } from 'react-native';
type GreetProps = {
name: string | null;
};
const Greet: React.FC<GreetProps> = ({ name }) => (
<View>
<Text>{name ? `Hello, ${name}` : "Hello, guest"}</Text>
</View>
);
export default Greet;
@types & Integrating TypeScripts
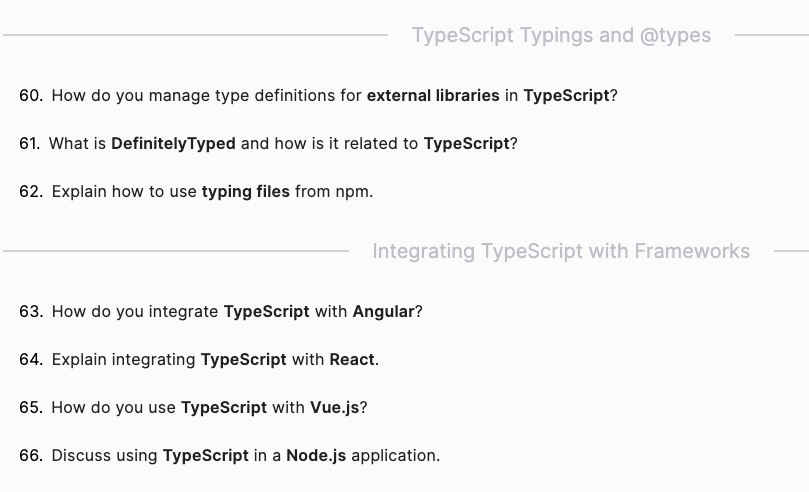
60. How do you manage type definitions for external libraries in TypeScript?
TypeScript uses declaration files (with the .d.ts extension) to provide type information about external JavaScript libraries. These files define the types and APIs of the libraries so that TypeScript can check your code for type errors.
Example:
To add type definitions for an external library, you can install the types from the DefinitelyTyped repository using npm:
npm install @types/lodashThis command installs type definitions for the lodash library, allowing you to use it with TypeScript with full type-checking support.
61. What is DefinitelyTyped and how is it related to TypeScript?
DefinitelyTyped is a repository of high-quality TypeScript type definitions for popular JavaScript libraries. It provides community-contributed type definitions that allow TypeScript to understand the types and APIs of these libraries. The type definitions are distributed via npm under the @types scope.
62. Explain how to use typing files from npm.
Typing files from npm can be used by installing the corresponding @types package for the library you want to use. These packages provide type information that TypeScript can use to type-check your code.
Example:
To use type definitions for the moment library:
- Install the
momentlibrary and its type definitions:
npm install moment
npm install @types/moment- Use the library in your TypeScript code:
import * as moment from 'moment';
const now = moment().format('MMMM Do YYYY, h:mm:ss a');
console.log(now);
63. How do you integrate TypeScript with Angular?
Angular has built-in support for TypeScript, and it’s the recommended language for developing Angular applications. Angular CLI generates TypeScript code and configuration by default.
Example:
- Install Angular CLI:
npm install -g @angular/cli- Create a new Angular project:
ng new my-angular-app- The project will be set up with TypeScript, and you can start developing your Angular application using TypeScript.
64. Explain integrating TypeScript with React.
To integrate TypeScript with React, you can use the create-react-app tool with TypeScript template or set up a custom configuration.
Example:
- Create a new React app with TypeScript:
npx create-react-app my-react-app --template typescript- Use TypeScript in your React components:
// src/App.tsx
import React from 'react';
type AppProps = {
message: string;
};
const App: React.FC<AppProps> = ({ message }) => (
<div>
<h1>{message}</h1>
</div>
);
export default App;
65. How do you use TypeScript with Vue.js?
To use TypeScript with Vue.js, you can use the Vue CLI to create a new project with TypeScript support.
Example:
- Install Vue CLI:
npm install -g @vue/cli- Create a new Vue project with TypeScript:
vue create my-vue-app- Select the TypeScript option during the project creation.
- Use TypeScript in your Vue components:
// src/components/HelloWorld.vue
<template>
<div class="hello">
<h1>{{ msg }}</h1>
</div>
</template>
<script lang="ts">
import { defineComponent } from 'vue';
export default defineComponent({
props: {
msg: String
}
});
</script>
66. Discuss using TypeScript in a Node.js application.
To use TypeScript in a Node.js application, you need to set up TypeScript and configure it properly.
Example:
- Initialize a Node.js project:
npm init -y- Install TypeScript and types for Node.js:
npm install typescript @types/node- Create a
tsconfig.jsonfile:
{
"compilerOptions": {
"target": "es6",
"module": "commonjs",
"outDir": "./dist",
"rootDir": "./src",
"strict": true,
"esModuleInterop": true
},
"include": ["src/**/*"]
}- Write your TypeScript code in the
srcdirectory:
// src/index.ts
import * as http from 'http';
const server = http.createServer((req, res) => {
res.statusCode = 200;
res.setHeader('Content-Type', 'text/plain');
res.end('Hello, TypeScript with Node.js!\n');
});
server.listen(3000, () => {
console.log('Server running at http://localhost:3000/');
});- Compile the TypeScript code and run the application:
npx tsc
node dist/index.js
These explanations and examples provide a comprehensive understanding of managing type definitions and integrating TypeScript with various frameworks, especially in the context of developing with React, Vue.js, Angular, and Node.js.
Tooling & Ecosystem

67. What are the benefits of using tools like TSLint?
TSLint was a tool for linting TypeScript code, helping developers catch potential errors and enforce coding standards. Although TSLint has been deprecated in favor of ESLint, its benefits included:
- Enforcing consistent coding styles and conventions.
- Catching common errors and potential bugs early.
- Improving code quality and maintainability.
- Integrating with build processes and IDEs to provide real-time feedback.
68. Can you describe how to set up a build process with TypeScript and Webpack?
Setting up a build process with TypeScript and Webpack involves configuring Webpack to handle TypeScript files, transpile them to JavaScript, and bundle them for deployment.
Example:
- Install necessary packages:
npm install --save-dev typescript ts-loader webpack webpack-cli- Create a
tsconfig.jsonfile for TypeScript configuration:
{
"compilerOptions": {
"target": "es6",
"module": "commonjs",
"outDir": "./dist",
"rootDir": "./src",
"strict": true,
"esModuleInterop": true
}
}- Create a
webpack.config.jsfile for Webpack configuration:
const path = require('path');
module.exports = {
entry: './src/index.ts',
module: {
rules: [
{
test: /\.ts$/,
use: 'ts-loader',
exclude: /node_modules/
}
]
},
resolve: {
extensions: ['.ts', '.js']
},
output: {
filename: 'bundle.js',
path: path.resolve(__dirname, 'dist')
}
};- Create your TypeScript source file (
src/index.ts):
console.log('Hello, TypeScript with Webpack!');- Add a build script to
package.json:
"scripts": {
"build": "webpack"
}- Run the build process:
npm run build69. How does TypeScript work with Babel?
Babel can be used to transpile TypeScript code to JavaScript. This is useful if you want to leverage Babel’s extensive plugin ecosystem alongside TypeScript.
Example:
- Install necessary packages:
npm install --save-dev @babel/core @babel/preset-env @babel/preset-typescript- Create a
babel.config.jsonfile:
{
"presets": [
"@babel/preset-env",
"@babel/preset-typescript"
]
}- Create a
tsconfig.jsonfile:
{
"compilerOptions": {
"target": "es6",
"module": "commonjs",
"outDir": "./dist",
"rootDir": "./src",
"strict": true,
"esModuleInterop": true
}
}- Create your TypeScript source file (
src/index.ts):
console.log('Hello, TypeScript with Babel!');- Add a build script to
package.json:
"scripts": {
"build": "babel src --out-dir dist --extensions \".ts\""
}- Run the build process:
npm run build70. Explain using TypeScript with Visual Studio Code or other IDEs.
Visual Studio Code (VS Code) has built-in support for TypeScript, providing features such as IntelliSense, debugging, and code navigation. You can enhance your TypeScript development experience with extensions like ESLint, Prettier, and others.
Example setup:
- Open your TypeScript project in VS Code.
- Install the ESLint and Prettier extensions from the Extensions Marketplace.
- Configure your
.eslintrc.jsonand.prettierrcfiles as needed. - Enjoy features like IntelliSense, inline error reporting, and code formatting.
71. What are the best practices for structuring a TypeScript application?
Best practices for structuring a TypeScript application include:
- Organize code into modules and directories logically.
- Use
tsconfig.jsonfor TypeScript configuration. - Leverage TypeScript features like interfaces and types for type safety.
- Write tests and use a testing framework like Jest.
- Follow a consistent coding style using tools like ESLint and Prettier.
Example structure:
src/
components/
MyComponent.tsx
services/
ApiService.ts
models/
User.ts
utils/
helpers.ts
index.ts
tests/
MyComponent.test.tsx
ApiService.test.ts
tsconfig.json
.eslintrc.json
.prettierrc
package.json
72. How do you handle async/await in TypeScript?
TypeScript provides full support for async and await, allowing you to write asynchronous code that is more readable and maintainable.
Example:
async function fetchData(url: string): Promise<any> {
const response = await fetch(url);
if (!response.ok) {
throw new Error('Network response was not ok');
}
return response.json();
}
async function main() {
try {
const data = await fetchData('https://api.example.com/data');
console.log(data);
} catch (error) {
console.error('Error:', error);
}
}
main();
73. Discuss how you manage state in TypeScript-based applications.
In TypeScript-based applications, you can manage state using various state management libraries like Redux, MobX, or React’s built-in useState and useReducer hooks.
Example with React and useState:
import React, { useState } from 'react';
type CounterProps = {
initialCount: number;
};
const Counter: React.FC<CounterProps> = ({ initialCount }) => {
const [count, setCount] = useState<number>(initialCount);
return (
<div>
<p>Count: {count}</p>
<button onClick={() => setCount(count + 1)}>Increment</button>
</div>
);
};
export default Counter;
Example with Redux:
- Install Redux and its TypeScript bindings:
npm install redux react-redux @types/react-redux- Define state and actions:
// src/store/types.ts
export interface AppState {
count: number;
}
export const INCREMENT = 'INCREMENT';
interface IncrementAction {
type: typeof INCREMENT;
}
export type AppActions = IncrementAction;- Create reducer and store:
// src/store/reducers.ts
import { AppState, AppActions, INCREMENT } from './types';
const initialState: AppState = {
count: 0,
};
export const reducer = (state = initialState, action: AppActions): AppState => {
switch (action.type) {
case INCREMENT:
return { ...state, count: state.count + 1 };
default:
return state;
}
};
// src/store/index.ts
import { createStore } from 'redux';
import { reducer } from './reducers';
export const store = createStore(reducer);- Connect React component to Redux store:
// src/components/Counter.tsx
import React from 'react';
import { useDispatch, useSelector } from 'react-redux';
import { AppState, INCREMENT } from '../store/types';
const Counter: React.FC = () => {
const count = useSelector((state: AppState) => state.count);
const dispatch = useDispatch();
return (
<div>
<p>Count: {count}</p>
<button onClick={() => dispatch({ type: INCREMENT })}>Increment</button>
</div>
);
};
export default Counter;
74. What are some common design patterns used in TypeScript?
Common design patterns used in TypeScript include:
- Singleton: Ensures a class has only one instance and provides a global point of access to it.
- Factory: Creates objects without specifying the exact class of object that will be created.
- Observer: Defines a one-to-many dependency between objects so that when one object changes state, all its dependents are notified.
- Strategy: Defines a family of algorithms, encapsulates each one, and makes them interchangeable.
Example of Singleton Pattern:
class Singleton {
private static instance: Singleton;
private constructor() {}
static getInstance(): Singleton {
if (!Singleton.instance) {
Singleton.instance = new Singleton();
}
return Singleton.instance;
}
}
const singleton1 = Singleton.getInstance();
const singleton2 = Singleton.getInstance();
console.log(singleton1 === singleton2); // true
75. How do you debug a TypeScript application?
Debugging a TypeScript application can be done using various tools and techniques:
- Source Maps: Enable
sourceMapintsconfig.jsonto map compiled JavaScript code back to the original TypeScript source code. This helps in debugging with breakpoints. - Integrated Development Environments (IDEs): Use an IDE like Visual Studio Code, which has built-in support for TypeScript and debugging tools.
- Browser Developer Tools: Use browser developer tools to set breakpoints, inspect variables, and step through code.
Example setup for VS Code debugging:
- Enable
sourceMapintsconfig.json:
{
"compilerOptions": {
"sourceMap": true
}
}- Create a launch configuration in
.vscode/launch.json:
{
"version": "0.2.0",
"configurations": [
{
"type": "node",
"request": "launch",
"name": "Launch Program",
"skipFiles": ["<node_internals>/**"],
"program": "${workspaceFolder}/src/index.ts",
"preLaunchTask": "tsc: build - tsconfig.json",
"outFiles": ["${workspaceFolder}/dist/**/*.js"]
}
]
}- Add a build task in
.vscode/tasks.json:
{
"version": "2.0.0",
"tasks": [
{
"label": "tsc: build - tsconfig.json",
"type": "typescript",
"tsconfig": "tsconfig.json",
"problemMatcher": ["$tsc"],
"group": {
"kind": "build",
"isDefault": true
}
}
]
}
Testing & QA
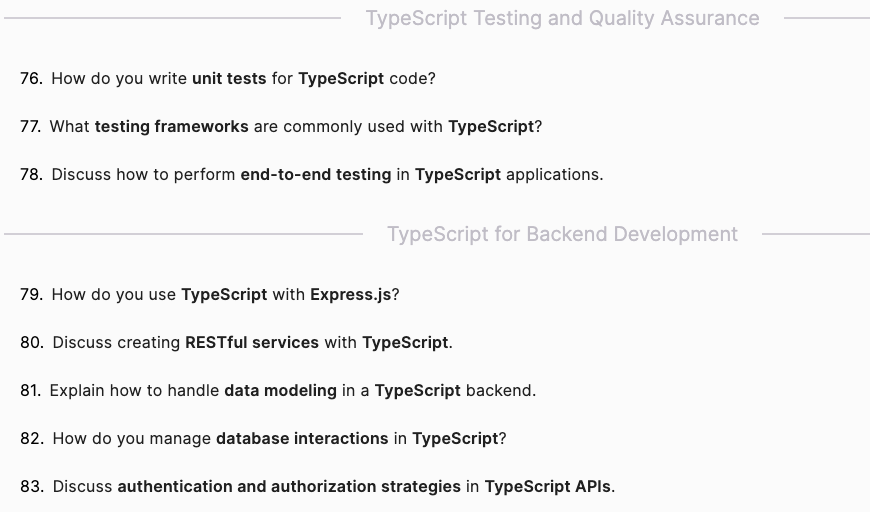
76. How do you write unit tests for TypeScript code?
Unit tests for TypeScript code can be written using testing frameworks like Jest or Mocha along with TypeScript support.
Example with Jest:
- Install necessary packages:
npm install --save-dev jest @types/jest ts-jest- Create a
jest.config.jsfile:
module.exports = {
preset: 'ts-jest',
testEnvironment: 'node',
testMatch: ['**/?(*.)+(spec|test).[jt]s?(x)']
};- Write your TypeScript code:
// src/sum.ts
export function sum(a: number, b: number): number {
return a + b;
}- Write a unit test:
// src/sum.test.ts
import { sum } from './sum';
test('adds 1 + 2 to equal 3', () => {
expect(sum(1, 2)).toBe(3);
});- Run the tests:
npx jest77. What testing frameworks are commonly used with TypeScript?
Commonly used testing frameworks with TypeScript include:
- Jest: A powerful, easy-to-use testing framework with built-in support for TypeScript through
ts-jest. - Mocha: A flexible testing framework that can be used with
ts-nodeandchaifor TypeScript support. - Jasmine: Another popular testing framework that can be used with TypeScript.
- Karma: A test runner that can be integrated with Jasmine, Mocha, or other testing frameworks.
78. Discuss how to perform end-to-end testing in TypeScript applications.
End-to-end (E2E) testing in TypeScript applications can be performed using tools like Cypress or TestCafe, which support TypeScript.
Example with Cypress:
- Install Cypress and its TypeScript support:
npm install --save-dev cypress @types/cypress- Configure Cypress to use TypeScript by adding a
tsconfig.jsonin thecypressdirectory:
{
"compilerOptions": {
"target": "es5",
"lib": ["es5", "dom"],
"types": ["cypress"]
}
}- Write an E2E test in TypeScript:
// cypress/integration/sample_spec.ts
describe('My First Test', () => {
it('Visits the Kitchen Sink', () => {
cy.visit('https://example.cypress.io');
cy.contains('type').click();
cy.url().should('include', '/commands/actions');
cy.get('.action-email').type('fake@email.com').should('have.value', 'fake@email.com');
});
});- Run Cypress:
npx cypress open79. How do you use TypeScript with Express.js?
To use TypeScript with Express.js, you need to set up a TypeScript project and install the necessary types for Express.
- Install necessary packages:
npm install express @types/express typescript ts-node- Create a
tsconfig.jsonfile:
{
"compilerOptions": {
"target": "es6",
"module": "commonjs",
"outDir": "./dist",
"rootDir": "./src",
"strict": true,
"esModuleInterop": true
}
}- Write your Express application:
// src/app.ts
import express, { Request, Response } from 'express';
const app = express();
const port = 3000;
app.get('/', (req: Request, res: Response) => {
res.send('Hello, TypeScript with Express!');
});
app.listen(port, () => {
console.log(`Server running at http://localhost:${port}/`);
});- Compile and run the application:
npx tsc
node dist/app.js
80. Discuss creating RESTful services with TypeScript.
Creating RESTful services with TypeScript involves setting up an Express server and defining routes for CRUD operations.
Example:
- Install necessary packages:
npm install express @types/express body-parser typescript ts-node- Create a
tsconfig.jsonfile:
{
"compilerOptions": {
"target": "es6",
"module": "commonjs",
"outDir": "./dist",
"rootDir": "./src",
"strict": true,
"esModuleInterop": true
}
}- Write your RESTful service:
// src/app.ts
import express, { Request, Response } from 'express';
import bodyParser from 'body-parser';
const app = express();
const port = 3000;
app.use(bodyParser.json());
interface Todo {
id: number;
title: string;
completed: boolean;
}
let todos: Todo[] = [
{ id: 1, title: 'Learn TypeScript', completed: false },
{ id: 2, title: 'Learn Express', completed: false }
];
app.get('/todos', (req: Request, res: Response) => {
res.json(todos);
});
app.post('/todos', (req: Request, res: Response) => {
const newTodo: Todo = req.body;
todos.push(newTodo);
res.status(201).json(newTodo);
});
app.listen(port, () => {
console.log(`Server running at http://localhost:${port}/`);
});- Compile and run the application:
npx tsc
node dist/app.js
81. Explain how to handle data modeling in a TypeScript backend.
Data modeling in a TypeScript backend can be handled using interfaces and classes to define the structure of the data objects.
Example:
interface User {
id: number;
name: string;
email: string;
}
class UserModel {
private users: User[] = [];
createUser(user: User): User {
this.users.push(user);
return user;
}
getUserById(id: number): User | undefined {
return this.users.find(user => user.id === id);
}
}
const userModel = new UserModel();
const newUser = userModel.createUser({ id: 1, name: 'Alice', email: 'alice@example.com' });
console.log(userModel.getUserById(1));
82. How do you manage database interactions in TypeScript?
Database interactions in TypeScript can be managed using ORM libraries like TypeORM, Sequelize, or Mongoose (for MongoDB).
Example with TypeORM:
- Install necessary packages:
npm install typeorm reflect-metadata sqlite3- Create a
tsconfig.jsonfile:
{
"compilerOptions": {
"target": "es6",
"module": "commonjs",
"outDir": "./dist",
"rootDir": "./src",
"strict": true,
"esModuleInterop": true,
"experimentalDecorators": true,
"emitDecoratorMetadata": true
}
}- Define an entity and repository:
// src/entity/User.ts
import { Entity, PrimaryGeneratedColumn, Column } from 'typeorm';
@Entity()
export class User {
@PrimaryGeneratedColumn()
id: number;
@Column()
name: string;
@Column()
email: string;
}- Set up TypeORM and create a database connection:
// src/index.ts
import 'reflect-metadata';
import { createConnection } from 'typeorm';
import { User } from './entity/User';
createConnection({
type: 'sqlite',
database: 'database.sqlite',
entities: [User],
synchronize: true,
logging: false
}).then(async connection => {
const userRepository = connection.getRepository(User);
const user = new User();
user.name = 'John Doe';
user.email = 'john.doe@example.com';
await userRepository.save(user);
const savedUsers = await userRepository.find();
console.log('All users:', savedUsers);
}).catch(error => console.log(error));- Compile and run the application:
npx tsc
node dist/index.js
83. Discuss authentication and authorization strategies in TypeScript APIs.
Authentication and authorization can be implemented using various strategies like JWT (JSON Web Tokens), OAuth, or session-based authentication.
Example with JWT:
- Install necessary packages:
npm install jsonwebtoken @types/jsonwebtoken express express-jwt @types/express- Create middleware for JWT authentication:
// src/middleware/auth.ts
import expressJwt from 'express-jwt';
import jwt from 'jsonwebtoken';
const secret = 'your_jwt_secret';
export const jwtMiddleware = expressJwt({ secret, algorithms: ['HS256'] });
export const generateToken = (user: any) => {
return jwt.sign(user, secret, { expiresIn: '1h' });
};- Protect routes with JWT middleware:
// src/app.ts
import express, { Request, Response } from 'express';
import { jwtMiddleware, generateToken } from './middleware/auth';
const app = express();
const port = 3000;
app.use(express.json());
app.post('/login', (req: Request, res: Response) => {
const
{ username, password } = req.body;
if (username === 'admin' && password === 'password') {
const token = generateToken({ username });
res.json({ token });
} else {
res.status(401).send('Invalid credentials');
}
});
app.get('/protected', jwtMiddleware, (req: Request, res: Response) => {
res.send('This is a protected route');
});
app.listen(port, () => {
console.log(`Server running at http://localhost:${port}/`);
});- Compile and run the application:
npx tsc
node dist/app.js
Advanced Practices

84. Discuss using TypeScript for Domain-driven Design (DDD).
Domain-driven Design (DDD) is a software development approach focusing on modeling software to match a domain according to input from domain experts. TypeScript is well-suited for DDD due to its strong typing and interface features, which help in creating clear and maintainable domain models.
Example:
- Define domain entities and value objects:
// src/domain/User.ts
export class User {
constructor(public id: UserId, public name: UserName) {}
}
export class UserId {
constructor(public value: string) {}
}
export class UserName {
constructor(public value: string) {}
}- Create repositories and services:
// src/domain/UserRepository.ts
import { User } from './User';
export interface UserRepository {
findById(id: string): Promise<User | null>;
save(user: User): Promise<void>;
}- Implement application services:
// src/application/UserService.ts
import { UserRepository } from '../domain/UserRepository';
import { User, UserId, UserName } from '../domain/User';
export class UserService {
constructor(private userRepository: UserRepository) {}
async registerUser(id: string, name: string): Promise<void> {
const user = new User(new UserId(id), new UserName(name));
await this.userRepository.save(user);
}
}
85. How do you implement Event Sourcing in TypeScript?
Event Sourcing is a pattern where changes to the application state are stored as a sequence of events. TypeScript can be used to implement Event Sourcing by defining event types and handlers.
Example:
- Define event types:
// src/events/UserEvents.ts
export interface UserRegisteredEvent {
type: 'UserRegistered';
data: {
userId: string;
userName: string;
};
}
export interface UserNameChangedEvent {
type: 'UserNameChanged';
data: {
userId: string;
newUserName: string;
};
}
export type UserEvent = UserRegisteredEvent | UserNameChangedEvent;- Create event store and event handler:
// src/eventStore/EventStore.ts
import { UserEvent } from '../events/UserEvents';
export class EventStore {
private events: UserEvent[] = [];
append(event: UserEvent) {
this.events.push(event);
}
getEvents(): UserEvent[] {
return this.events;
}
}
// src/handlers/UserEventHandler.ts
import { EventStore } from '../eventStore/EventStore';
import { UserEvent } from '../events/UserEvents';
export class UserEventHandler {
constructor(private eventStore: EventStore) {}
handle(event: UserEvent) {
this.eventStore.append(event);
// Handle the event (e.g., update read models)
}
}
86. Explain the concept of Isomorphic apps with TypeScript.
Isomorphic (or Universal) apps are applications that can run both on the server and the client. TypeScript’s strong typing and support for both Node.js and browser environments make it an excellent choice for building isomorphic apps.
Example with Next.js:
- Install Next.js and TypeScript:
npx create-next-app@latest --typescript- Create a shared component:
// src/components/Hello.tsx
import React from 'react';
type HelloProps = {
name: string;
};
const Hello: React.FC<HelloProps> = ({ name }) => <div>Hello, {name}!</div>;
export default Hello;- Use the component in a page:
// src/pages/index.tsx
import React from 'react';
import Hello from '../components/Hello';
const Home: React.FC = () => (
<div>
<Hello name="Isomorphic TypeScript" />
</div>
);
export default Home;
87. How does TypeScript align with the latest ECMAScript standards?
TypeScript is designed to align closely with ECMAScript standards, providing early access to upcoming features through the target and lib compiler options. It supports all current ECMAScript features and allows developers to write modern JavaScript code with type safety.
88. What enhancements has TypeScript brought to match ES6 and beyond?
TypeScript has brought several enhancements to match ES6 and beyond, including:
- Type Annotations: Adds static typing to JavaScript.
- Interfaces: Provides a way to define the shape of objects.
- Enums: Adds support for enumerated types.
- Generics: Allows writing reusable and type-safe code.
- Decorators: Experimental feature for adding metadata and modifying behavior of classes and properties.
- Async/Await: Support for writing asynchronous code more elegantly.
89. Discuss how TypeScript handles async iterators.
TypeScript supports async iterators, which allow you to iterate over asynchronous data sources using the for-await-of loop.
Example:
async function* fetchItems(urls: string[]) {
for (const url of urls) {
const response = await fetch(url);
const data = await response.json();
yield data;
}
}
async function processItems(urls: string[]) {
for await (const item of fetchItems(urls)) {
console.log(item);
}
}
const urls = ['https://api.example.com/item1', 'https://api.example.com/item2'];
processItems(urls);
Performance Optimization

90. How do you optimize the performance of a TypeScript application?
Optimizing the performance of a TypeScript application involves several strategies:
- Code Splitting: Divide your code into smaller chunks that can be loaded on demand.
- Lazy Loading: Load modules only when they are needed, rather than at startup.
- Tree Shaking: Remove unused code during the bundling process.
- Minification: Reduce the size of your JavaScript files by removing whitespace, comments, and other unnecessary characters.
- Using Efficient Data Structures: Choose the right data structures for your use case to optimize memory usage and performance.
- Profiling and Benchmarking: Use tools like Chrome DevTools, Lighthouse, or Webpack Bundle Analyzer to identify and address performance bottlenecks.
91. Discuss tree shaking in TypeScript.
Tree shaking is a technique used to eliminate dead code (unused code) from the final bundle. It relies on the static analysis of ES6 module imports and exports to identify and remove code that is not used anywhere in the application.
Example:
- Write TypeScript code with unused functions:
// src/util.ts
export function usedFunction() {
console.log('This function is used');
}
export function unusedFunction() {
console.log('This function is not used');
}
// src/index.ts
import { usedFunction } from './util';
usedFunction();- Configure Webpack for tree shaking:
// webpack.config.js
const path = require('path');
module.exports = {
mode: 'production',
entry: './src/index.ts',
output: {
filename: 'bundle.js',
path: path.resolve(__dirname, 'dist'),
},
module: {
rules: [
{
test: /\.ts$/,
use: 'ts-loader',
exclude: /node_modules/,
},
],
},
resolve: {
extensions: ['.ts', '.js'],
},
optimization: {
usedExports: true,
},
};- Build the project:
npx webpack --config webpack.config.jsThis setup will ensure that the unusedFunction is removed from the final bundle.
92. Explain how to optimize bundle size with TypeScript.
Optimizing bundle size with TypeScript can be achieved through several techniques:
- Tree Shaking: Ensure that only the code that is used is included in the bundle.
- Code Splitting: Split the code into smaller chunks that can be loaded on demand.
- Minification: Use tools like Terser to minify the output JavaScript.
- Remove Unnecessary Polyfills: Only include polyfills for the features you actually use.
- Optimize Dependencies: Remove unused dependencies and use lighter alternatives when possible.
- Dynamic Imports: Use dynamic imports to load modules only when they are needed.
Example:
- Dynamic Import Example:
// src/app.ts
document.getElementById('loadButton')?.addEventListener('click', async () => {
const { usedFunction } = await import('./util');
usedFunction();
});- Configure Webpack for Code Splitting:
// webpack.config.js
const path = require('path');
module.exports = {
mode: 'production',
entry: './src/app.ts',
output: {
filename: 'bundle.js',
path: path.resolve(__dirname, 'dist'),
},
module: {
rules: [
{
test: /\.ts$/,
use: 'ts-loader',
exclude: /node_modules/,
},
],
},
resolve: {
extensions: ['.ts', '.js'],
},
optimization: {
splitChunks: {
chunks: 'all',
},
},
};
93. What are the new features included in the latest TypeScript release?
The latest TypeScript releases often include various new features, performance improvements, and bug fixes. Some of the recent features include:
- Template Literal Types: Allows you to create types based on template literals.
- Labeled Tuple Elements: Adds labels to tuple elements to make them more readable.
- Improved Type Inference in Conditional Types: Enhances the ability to infer types in complex conditional types.
- Recursive Type Aliases: Allows type aliases to reference themselves.
94. How do you use Template Literal Types?
Template Literal Types allow you to create types by combining string literals with union types.
Example:
type Color = 'red' | 'green' | 'blue';
type Size = 'small' | 'medium' | 'large';
type ProductID = `${Color}-${Size}`;
const product1: ProductID = 'red-small';
const product2: ProductID = 'green-large';
// Error: Type '"yellow-medium"' is not assignable to type 'ProductID'
// const product3: ProductID = 'yellow-medium';
95. Discuss the improvements to Inference in Conditional Types.
TypeScript’s improvements to inference in conditional types allow for more accurate and predictable type inference, especially in complex scenarios. These improvements help TypeScript understand the relationships between types better and provide more precise type checking.
Example:
type IsString<T> = T extends string ? true : false;
type Test1 = IsString<string>; // true
type Test2 = IsString<number>; // false
96. What is the use of labeled tuple elements?
Labeled tuple elements improve the readability and usability of tuples by allowing you to add labels to each element. This makes it easier to understand the purpose of each element in the tuple.
Example:
type Point = [x: number, y: number];
const point: Point = [10, 20];
const x = point[0]; // 10
const y = point[1]; // 20
Community & Development
97. How can you contribute to the TypeScript community or TypeScript itself?
Contributing to the TypeScript community or TypeScript itself can be done in several ways:
- Contributing to the TypeScript Codebase:
- Fork the TypeScript repository: Fork the TypeScript GitHub repository.
- Set up your development environment: Follow the contribution guidelines.
- Submit Pull Requests: Work on issues or new features and submit pull requests for review.
- Creating Type Definitions:
- Contribute to the DefinitelyTyped repository by creating or improving type definitions for popular JavaScript libraries.
- Writing Tutorials and Documentation:
- Write blog posts, tutorials, or create video content to help others learn TypeScript.
- Contribute to the official TypeScript documentation.
- Participating in Discussions:
- Join the TypeScript community on GitHub, Stack Overflow, or other forums to help answer questions and discuss TypeScript-related topics.
- Creating Open Source Projects:
- Develop and share TypeScript-based libraries, tools, or applications on GitHub.
98. Discuss the role of TypeScript in open-source development.
TypeScript plays a significant role in open-source development by providing a statically typed superset of JavaScript that helps developers catch errors early, maintain large codebases, and improve code readability. Its adoption in open-source projects has led to more robust and reliable software. Many popular open-source projects, such as Angular, Vue.js, and NestJS, are written in TypeScript, highlighting its importance in the ecosystem.
99. Explain how to stay updated with TypeScript’s changes and best practices.
To stay updated with TypeScript’s changes and best practices, you can:
- Follow the TypeScript Blog:
- Subscribe to the official TypeScript blog for announcements, updates, and best practices.
- Join the TypeScript Community:
- Participate in discussions on the TypeScript GitHub discussions and Stack Overflow.
- Subscribe to Newsletters:
- Subscribe to TypeScript-focused newsletters like TypeScript Weekly.
- Attend Conferences and Meetups:
- Attend conferences, webinars, and local meetups to learn from experts and network with other TypeScript developers.
- Follow Influential TypeScript Developers:
- Follow influential developers on social media platforms like Twitter, GitHub, and LinkedIn.
- Read Books and Documentation:
- Stay updated by reading the latest books on TypeScript and regularly reviewing the official TypeScript documentation.
100. What steps should a JavaScript developer take to start using TypeScript effectively?
For a JavaScript developer to start using TypeScript effectively, they can follow these steps:
- Learn the Basics:
- Understand the core concepts of TypeScript, such as type annotations, interfaces, and classes, by reviewing the official TypeScript handbook.
- Set Up a TypeScript Project:
- Install TypeScript globally:
npm install -g typescript. - Initialize a TypeScript project:
tsc --init. - Configure
tsconfig.jsonfor your project’s needs.
- Gradually Migrate Existing Code:
- Start by renaming
.jsfiles to.tsor.tsx(for React projects). - Incrementally add type annotations and interfaces to existing code.
- Use
anytype initially and gradually replace it with specific types as you become more comfortable.
- Leverage TypeScript Tools:
- Use IDEs like Visual Studio Code, which provide excellent TypeScript support, including IntelliSense and inline error reporting.
- Use linters like ESLint with TypeScript support to maintain code quality.
- Write Type-safe Code:
- Embrace TypeScript features such as type inference, union types, intersection types, and generics to write more robust and maintainable code.
- Practice and Explore:
- Build small projects or contribute to open-source projects written in TypeScript to gain hands-on experience.
- Stay Updated:
- Follow TypeScript news, join the community, and keep up with the latest features and best practices.
By following these steps, JavaScript developers can transition to TypeScript smoothly and take advantage of its benefits in their projects.






-
Tagged flutter, mobile-dev, react-native